Monday, November 7, 2011

The End: Finished Product

(Time Required: 45 minutes)

The new addition to this photo is the glass ornaments in shades of hunter green, blue-gray and brown along with the not well seen amber blown glass ornaments.  Standard round glass balls are not as elegant looking however they are less expensive and easier to replace than collectible glass ornaments.  Add a new set of more expensive ornaments each year and you will have the tree of your dreams eventually.  Shop for sales at Hobby Lobby where by November the ornaments are 50% off nearly every other week.  After a few years your creativity will continue to blossom and you will find this a hobby that is both enjoyable for you and those that will see your tree all season long.

I hope your Christmas this year is both blessed and beautiful.  I will post finished pictures of other projects this year as I go.  Here is a picture of my porch this year.


Sunday, November 6, 2011

THIS BLOG SHOULD BE READ FROM DATE OF FIRST POST First layer/sprays and ornaments: This is a blog to chronicle my process of decorating a tree from beginning to end in order to give the best advice for creating a professional interior designer looking Christmas tree that will be the envy of anyone that sees it.

(Time Required: 1.5 hours)

Lay out all of your supplies for this step on a worktable.  This is important because you must think of yourself as a painter and this is your palette.  Start with sprays pictured at the top of the picture.  They will fill up empty space. 

Try to use one type at a time and buy some variety.  When purchasing imagine how many of each spray will be needed to cover the visible area of the tree spacing each one evenly from the other.  I have here 3 kinds of sprays and since only ¾ of the tree is covered I used about 7 of each spray.

 
Add the rest of the ornaments starting with the largest ornaments first.  Space them evenly apart based on the number of ornaments.  If there are more ornaments, space them closer together, less; further apart.  Place the fewest number and prettiest ornaments at the front of the tree to add more variety.  You can see in this close up that there is variety even in a small area because there are a number of different ornaments.  Also resist the temptation to buy only one ornament you find that you like as you may have in the past.  A patchwork tree may be quaint but it will not be as aesthetically pleasing in the end.  8-12 ornaments of one variety is sufficient.   

From a distance you can see there are certain things that stand out such as the stars.  This is good since this is the theme of the tree, and more of those ornaments (the larger the better) will pull off that effect.  There are still a lot of bare spots and that will be taken care of by other glass ornaments next.  This will give contrast and the choice of colors will give it the "pop" that is needed to dazzle the viewer.


Thursday, November 3, 2011

THIS BLOG SHOULD BE READ FROM DATE OF FIRST POST Garland/Filler: This is a blog to chronicle my process of decorating a tree from beginning to end in order to give the best advice for creating a professional interior designer looking Christmas tree that will be the envy of anyone that sees it.


(Time required: 2 hours not including shopping)

This step is applying the garland or filler to the tree.  It is important to have a large themed area of the tree that attracts the eye and makes it look organized.  Otherwise the tree will look messy and the eye will not be attracted to any one area of the tree.  

First locate all of the materials that you will be using for this stage of the decorating.  Here are some samples of materials I could have used.  You may need to go shopping before this step.  Lay out all of your items on a table for each step so your materials are handy and no time is wasted going from room to room.

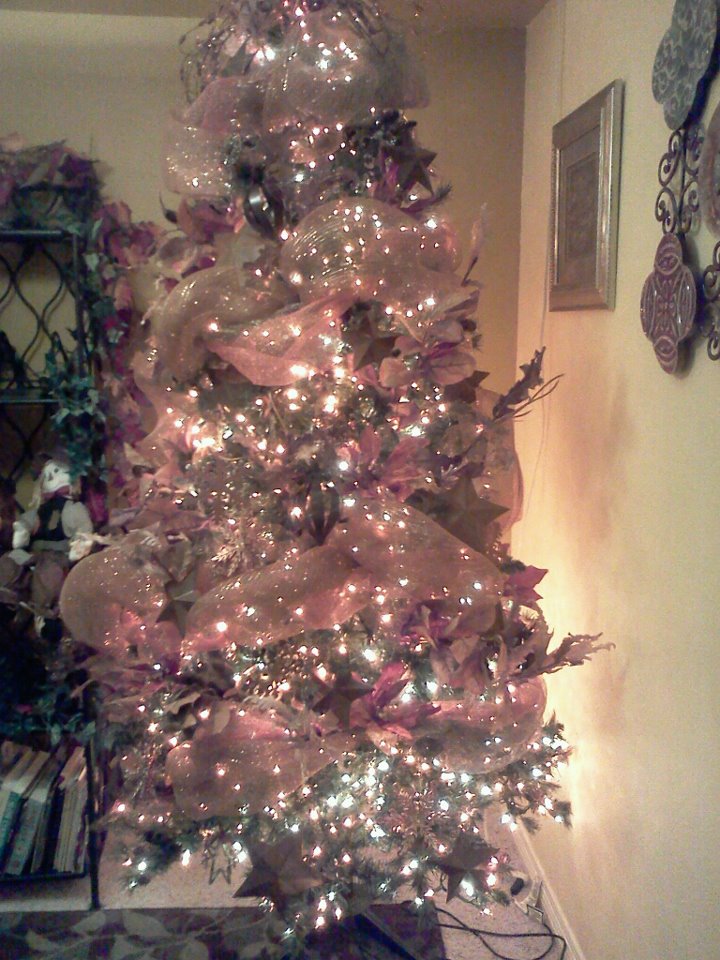
Symmetry is very important for any stage of decorating: remember this at all times.  There are different trends different years for trees; any Christmas store will allow you to see this years trend, or simply look at the materials available at the nearest Hobby Lobby.  This year the trend is Deco Poly Mesh which is featured on the long roll, and the front two piles folded in large squares.  Ribbon, tinsel garland (out of style) beads or floral garland such as berries are all appropriate ways to dress the tree.  Apply the filler first so the ornaments are not covered up unless it is so translucent that ornaments should be under the garland.  Some individuals prefer a top-to-bottom approach for ribbon or garland.  It is up to the individual, however I encourage you to change this part of the tree from year to year since it is inexpensive and will vary the look of the tree the most.


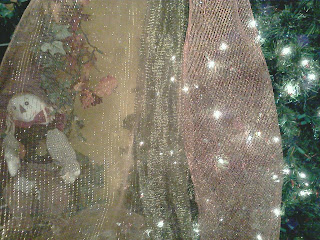
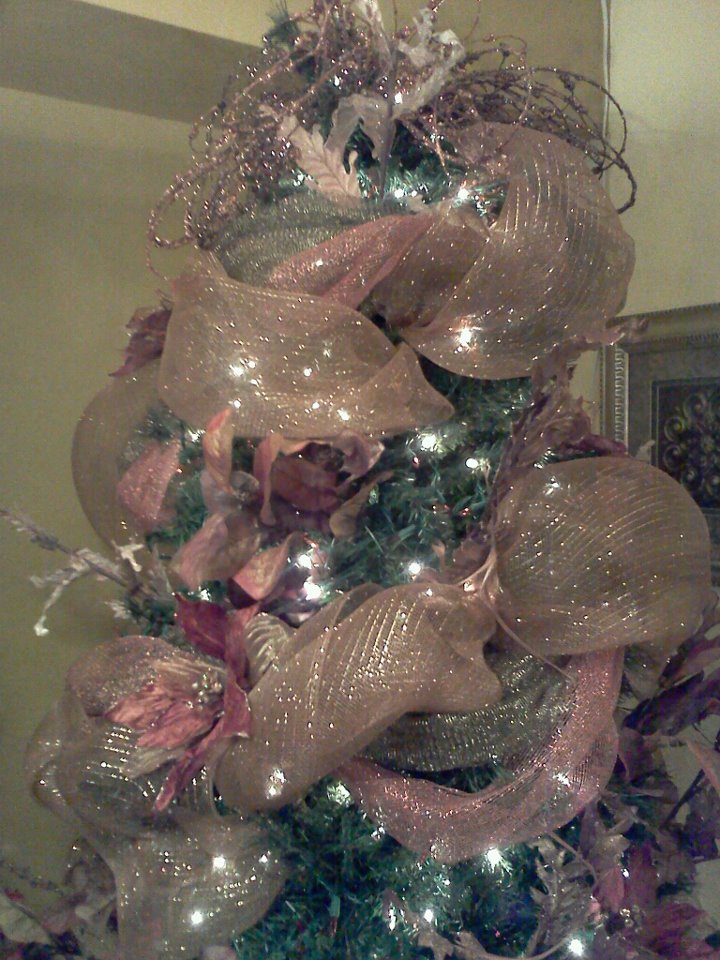
 These are the three types of Poly Mesh I decided to use for this tree.  (The other items which match the theme I will use on wreaths or garlands in the same room.  Varying the materials but staying in the same color theme will make the room look more interesting.  Use some ornaments from the tree to keep the theme continuous.)  Start with the smaller mesh which in this case is the copper and gold on the right and middle.  Weave them around each other so they look natural and so that both colors are evenly exposed.  Start at the top of the tree in the back so the start area is concealed.  
Secure the garland to the tree using the stems of the tree and use stems in the back reserving the front and longest stems for ornaments.  Wrap the larger mesh around the smaller mesh so the style is varied overlapping at different points.  Wrap the garland around the tree in a spiral fashion slanting downward like a candy cane stripe.  

Secure the mesh every foot or two feet, keeping the length shorter towards the top of the tree and longer towards the bottom to match the width perspective as shown here in this picture of the finished product.  This step takes practice so don't be afraid to attach some length and decide to re-do some of the garland.  Next year it will be much easier and you will move right along.

Next post:  Apply the large ornaments first.


Wednesday, November 2, 2011

THIS BLOG SHOULD BE READ FROM DATE OF FIRST POST Illumination: This is a blog to chronicle my process of decorating a tree from beginning to end in order to give the best advice for creating a professional interior designer looking Christmas tree that will be the envy of anyone that sees it.

(Time to complete this step: 4 hours)

Be sure to remove the unsightly tags from the lights before applying to the tree.  This will make the appearance of the tree better since the lights can reflect off of the tags. 

I always recommend a formula of lights that will “load” the tree with illumination for the best professional result since many of the decorations will cover the lights.  This way there is still sufficient illumination despite many of them being covered up.  Plan on multiplying the height in inches by 33.33 to find out how many lights are needed for a slim tree, a standard wide tree will be 44.44.  Most trees are 7.5 feet or 90 inches so for a slim tree 3,000 lights or a wide tree 4,000 lights are needed.  You can count the lights already on the tree as part of the total.  

 
Shape the stems in a star pattern so that they are evenly distributed facing out and each stem is perfectly straight.  Use the picture on the box as an example for the type of pine for best results since some pine trees are different such as the Hickory Pine or the White Pine.  Nearly all artificial trees follow this pattern though.  Additional re-shaping will be required after the lights are applied usually.
Untwist the lights if they are a new set as they come bundled like this.  Simply pull the lights apart while untwisting until they remain straight enough to work with.  This will avoid any bunching on the tree which will create a clumping of illumination.

Work the lights onto the branch starting at the back and move across the branch and then at the front of the branch wrap the lights around each individual stem 2 or 3 times to ensure an evenly distributed and heavy application.  Always apply the lights while plugged in to avoid applying a dead strand and to avoid any bald illumination spots.  Only plug up to 8 sets of 100 end to end to avoid blowing out the fuse in the first set.
When completed adjust any branches to close bald spots and your tree should be brilliant compared to any you have illuminated in the past.  I used the white lights that came pre-strung on the tree and then applied amber colored lights for my theme.  I connected the white lights to a dimmer so they would not overpower the amber and the effect is stunning.  The warm glow against the yellow wall is also quite nice.  Remember to choose tree colors that compliment your already present décor.  I would reserve multi-colored lights for trees with multi-colored ornaments such as a blown glass theme which can be quite lovely.

Stay tuned for the first layer of ornamentation next; applying the filler and garlands to the tree.


Tuesday, November 1, 2011

THIS BLOG SHOULD BE READ FROM DATE OF FIRST POST This is a blog to chronicle my process of decorating a tree from beginning to end in order to give the best advice for creating a professional interior designer looking Christmas tree that will be the envy of anyone that sees it.


 (Time to complete today's task - 30 minutes).

This process will be time consuming; not a “one night” job so give yourself plenty of time either over weeks if you spend an hour a day or a 3 day weekend spending 8-10 hours a day.  It usually takes me 10-20 hours to complete a tree for the entire process depending on the size of the tree.  You may do something and dislike it and start over too.

First assemble the tree according to the directions and plug in all of the lights into the extension cord usually provided within the tree.  These cords have a fuse in them to prevent fires due to overloading the cord.  It will only accommodate as many lights as the tree comes with.  Any other cord you buy at the store with a “switch or button” will have a fuse too and only handle about 1000 incandescent miniature lights.  (That’s 10 sets of 100)  Shape the tree in general so the branches are separated and the lights can be easily wound around the stems.  The tree will need additional shaping after the lights are applied.